Male cake from sweets. Original sweetness for any occasion - candy cake
Want to make an unusual sweet surprise that you can not buy in your favorite person in more than one store? All in your hands! Find out what kind of candy he or she likes, and make a wonderful and at the same time delicious cake made of chocolates with your own hands, step by step photo for beginners + detailed instructions will help you with this.
Making it is not difficult, no need to mess with dough and stove - this “dish” does not refer to cooking, but to needlework. The main thing is to be diligent and patient, adhere to all the recommendations of the proposed master class and you can be sure that as a result you will have an interesting and unusual product that will please the one to whom you are going to present it. By the way, you can make a pair of candy cake, then the gift will be complete.
Materials:
- foam or penofleks - for the base of the cake;
- Corrugated paper - for flowers;
- textile flowers - for decoration (optional);
- sandwich panel or thick cardboard;
- Double-sided tape;
- chocolate (I use portioned chocolate bars "Merci";
- thin wire;
- beads - for decor;
- tape tape (for flowers);
- braid for decoration;
- wide ribbon;
- narrow tape;
- sweets;
- thread;
- glue.
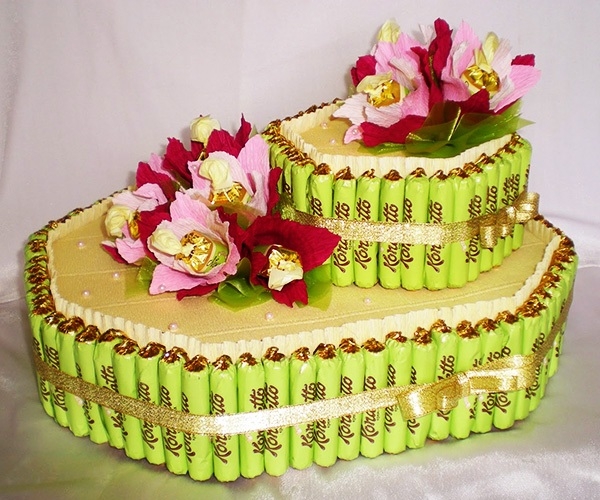
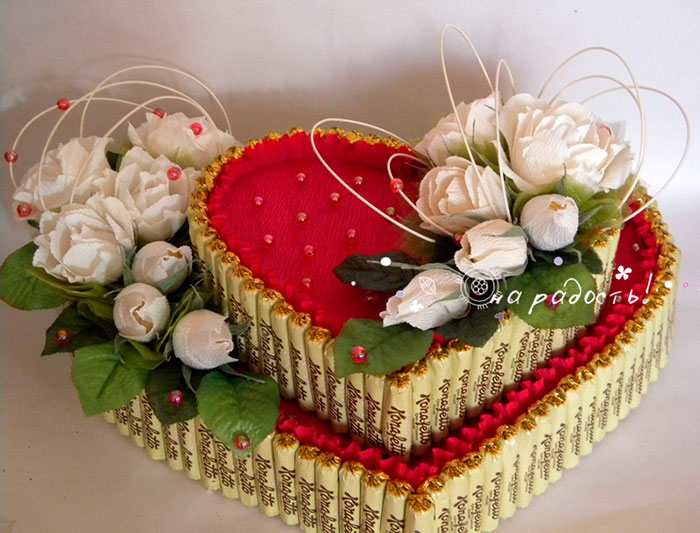
Step-by-step instructions for making a cake from heart-shaped chocolates with your own hands
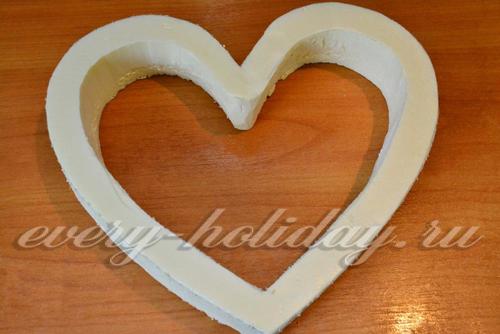
To make a cake out of sweets and chocolates in the shape of a heart with your own hands, you need to cut the base out of foam plastic or penoflex. I drew a heart on the penoflex and neatly cut out the blank with a clerical knife. Inside the resulting heart still cut out the heart. The result is such a blank.
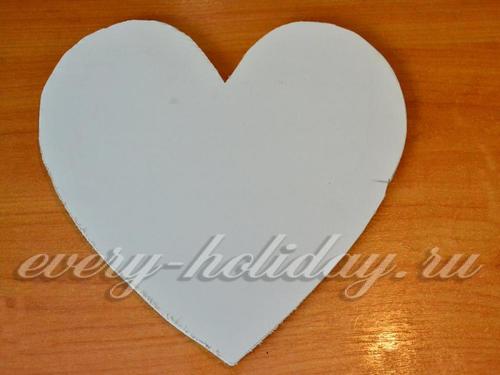
Next, from a sandwich panel or a dense piece of cardboard, you need to cut the heart, the size of our workpiece. This will be the bottom of the cake.
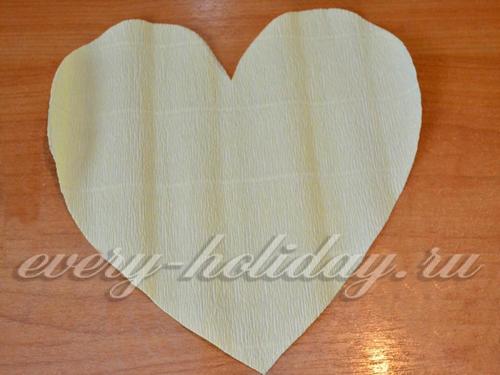
Now it is necessary to glue the bottom, sides and cuts of the heart with corrugated paper.
I cut out the heart of the corrugations.
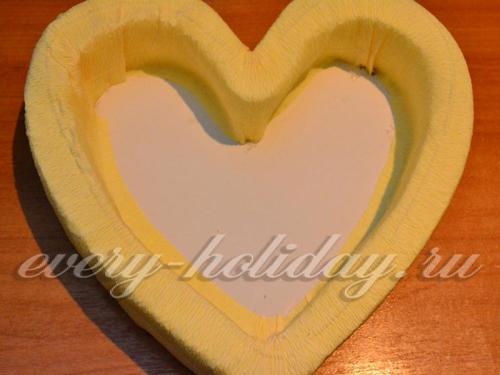
And glued it to the bottom. Then cut out a strip of corrugations and pasted over the sides of the workpiece.
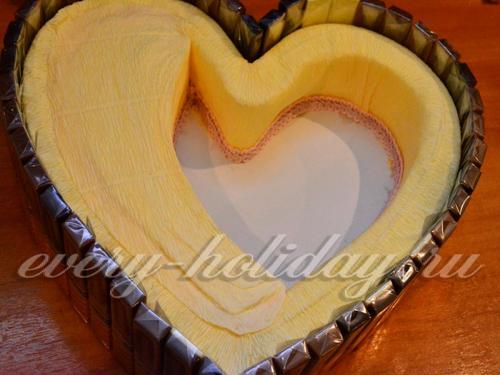
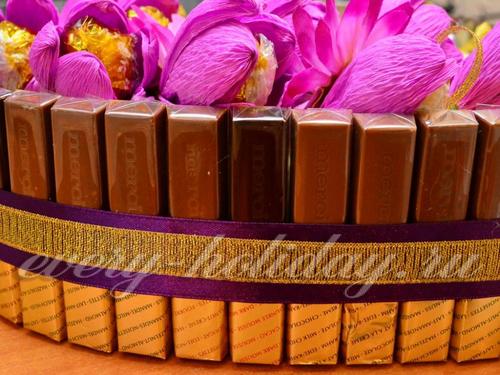
And now the most pleasant thing is sticking chocolate to the heart. I use for this double-sided tape. Scotch stick to the heart around the perimeter. And after that I gradually paste each candy on the second side of the scotch.
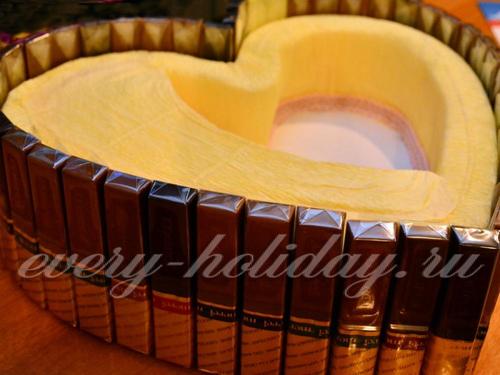
The top of the cake of sweets will be decorated with flowers. They can be glued just around the perimeter of the heart. In the process of work, I slightly widened one side of the heart, just cut a piece out of the penoflex, and pasted it inside the cake. That's what happened. I also pasted a piece of penoflex with corrugation. And the bottom of the cake is decorated with a tape around the perimeter.
The cake is almost ready, it remains only to decorate it. We will make flowers from corrugated paper with candies, and use textile flowers to match.
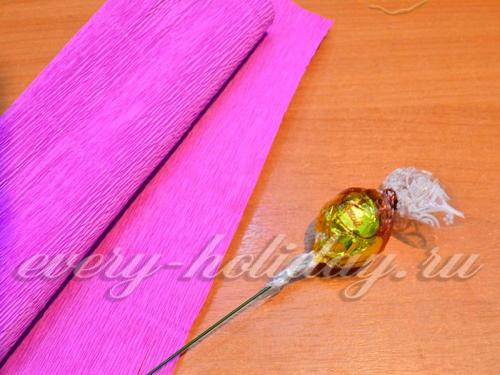
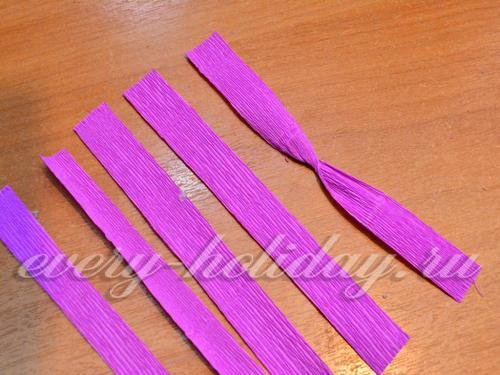
I use lilac corrugation. I used sweets round.
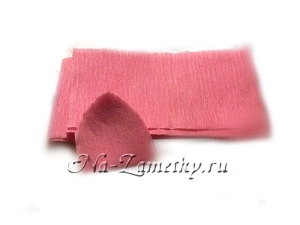
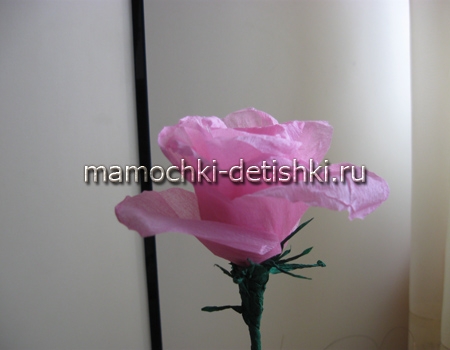
In order to make flowers of corrugated paper with sweets, you must take a piece of candy, tightly twist one tail from the wrapper onto the wire. And roll up the threads.
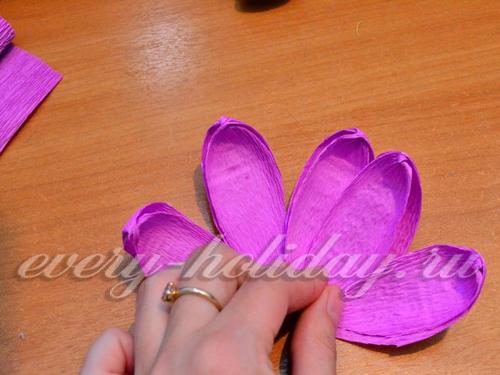
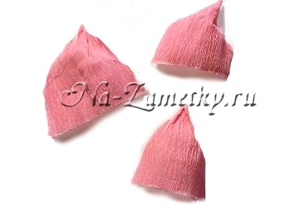
Cut the paper into strips, about 10 to 12 cm long, and 1.5 cm wide. The little flower will have 5 petals.
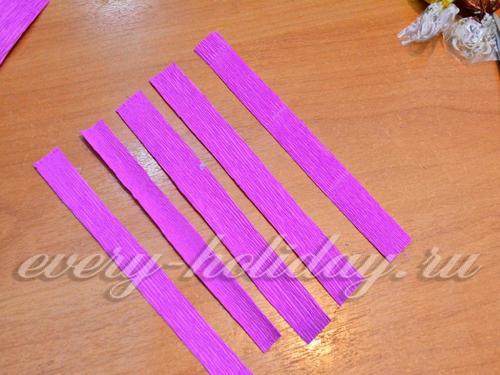

Fingers slightly stretch the paper, thereby giving the shape of a petal.
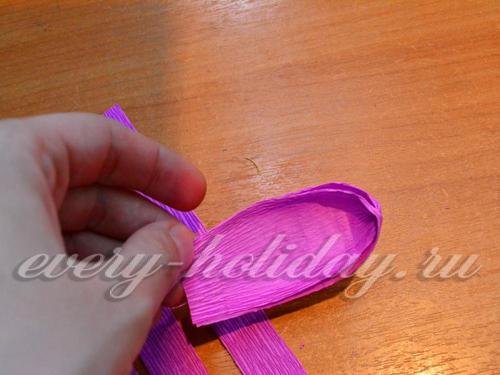
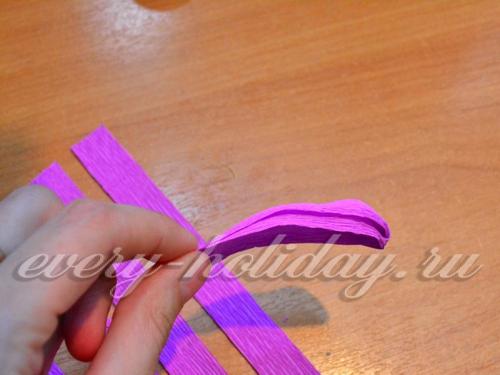
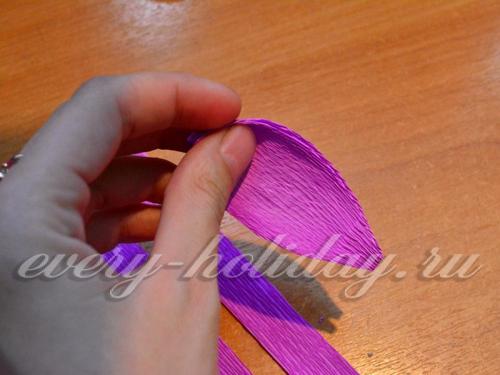
These are the petals turned out.
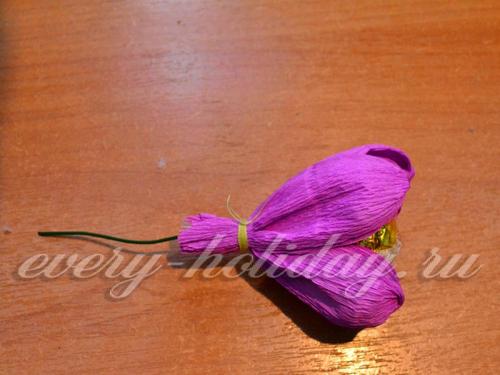

With the help of tape tape, you must wrap the tip of the flower and the wire. Instead of tapes, you can use a thin strip of corrugated green paper.
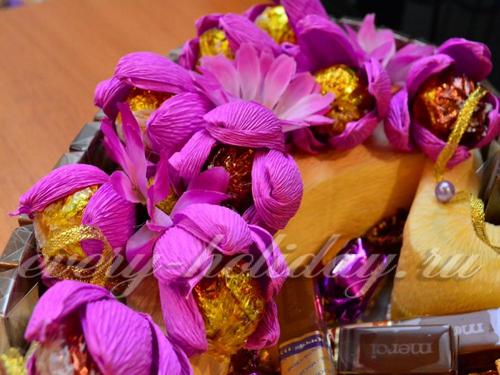
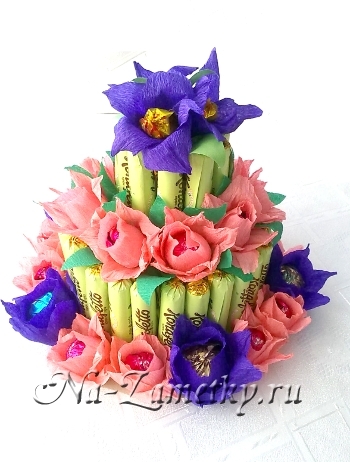
The resulting flowers stick on the cake. I made 9 colors of corrugations. If desired, you can use textile flowers, various leaves and greens.
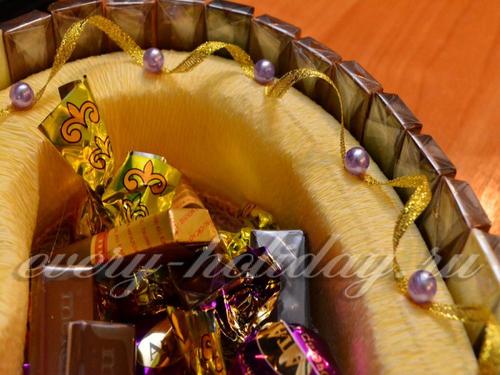
I decorated the other side of the heart with a thin brocade ribbon and beads.
The sides of the cake are decorated with ribbons to match the composition. Used a wide lilac satin ribbon and brocade ribbon, a little bit already.
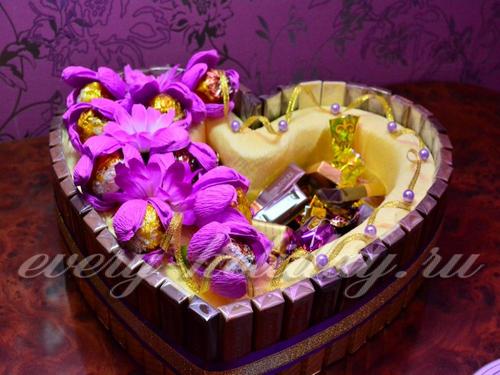
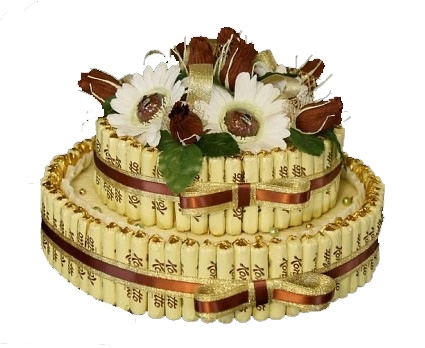
That's what happened.
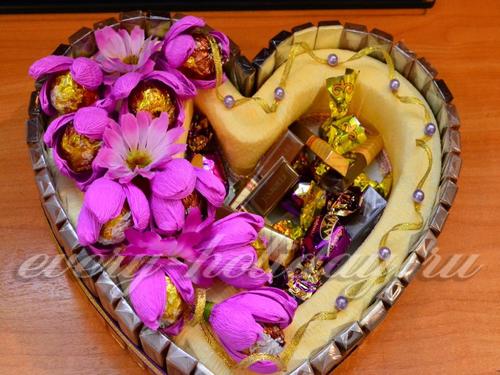
Heart-shaped candy cake is ready. Give presents beautifully.
Almost everyone loves sweets, so candy cakes are becoming increasingly popular every day. No wonder, because such products look solemn and festive. Moreover, such a gift is easy to make with your own hands!
Candy Cake: Master Class
You will need:
- Candies;
- Cardboard;
- Corrugated paper;
- Scissors;
- Double-sided tape or glue.
Instructions for implementation:
From the cardboard cut the frame for the cake. Glue scotch or glue to the base of the candy so that they hold firmly, but so that they can be detached at the same time.
Spread out corrugated paper, cut out the petals and stripes from which you can make flowers. The size of the flowers to match the size of the candy. By the way, you can also put small sweets in the buds themselves.
Wrap candy with a strip and stick petals to it, slightly twisting the edges. Sweets should be easily removed from the flowers.
Collect the sweet buds in a bouquet and attach to the prepared frame. Flowers can be decorated with green leaves of corrugated paper, beautiful beads, rhinestones, ribbons, sparkles and even small figures.
We also read:
- Gifts of candy
- Paper cake with wishes
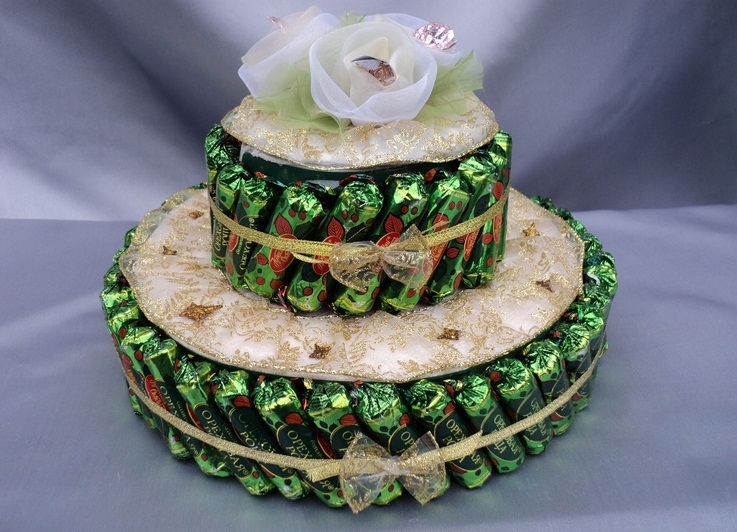
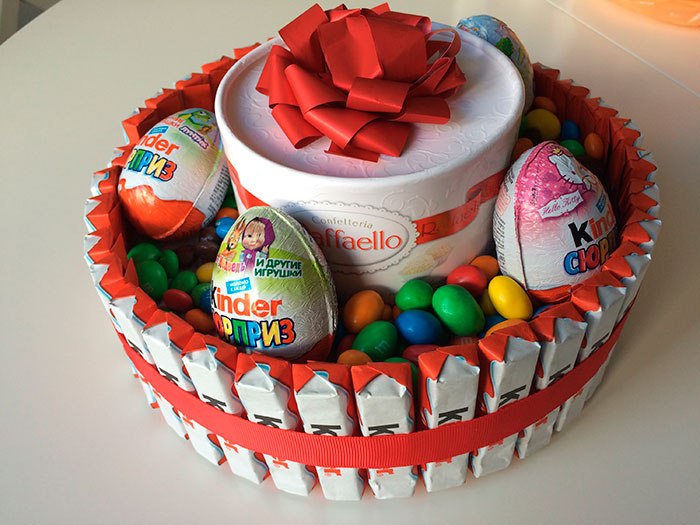
You will need:
- Candies;
- Styrofoam;
- Round box with cookies;
- Raphaelo's box;
- Corrugated paper;
- Double-sided tape;
- Scissors;
- Beads;
- Hot melt glue;
- Foil;
- Toothpicks;
- Candles;
- Beautiful fabric.
Instructions for implementation:
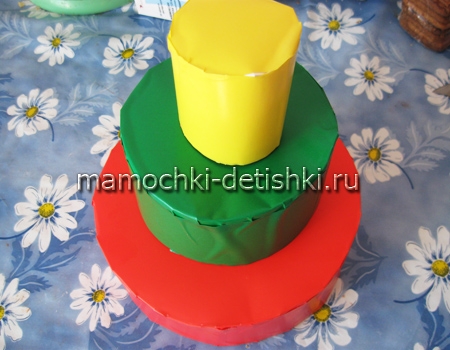
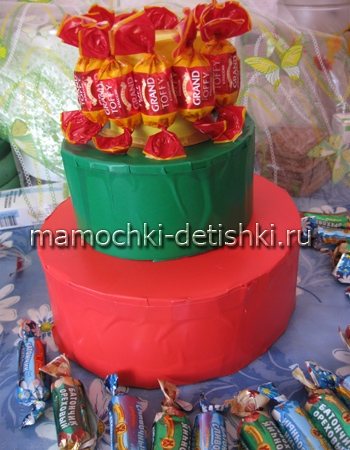
Cut the bottom layer of foam. The first must be the biggest. Sand the edges with sandpaper and wrap over it with a beautiful cloth.
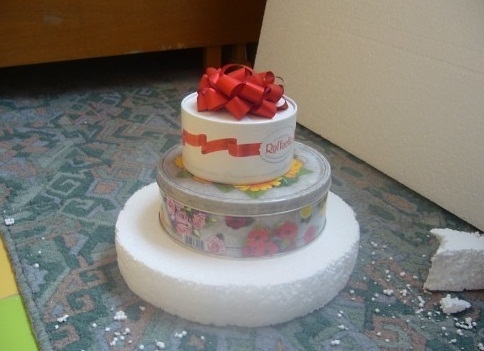
The second layer is a box with cookies. It also needs to be pasted over with a cloth using double-sided tape.
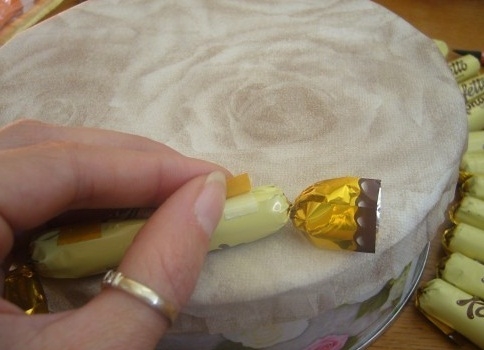
Cut a strip of corrugated paper, 4 cm wide. Glue the cut ribbon on the middle layer like a frill.
Attach sweets to the sides using double-sided tape.
For the bottom layer, cut the corrugated strip slightly above the base. Glue it to the foam using scotch tape. Stretch the top edges of the paper slightly to create a frill.
At the junction between the base and the shuttlecock, glue beautiful beads to hot melt glue. Secure sweets from the side.
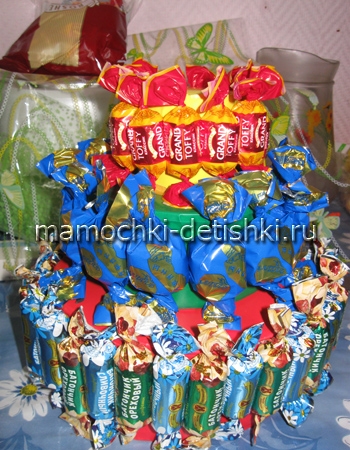
Now proceed to the design of the top layer, consisting of a box of Raphaelo. Tape it with a cloth, attach the crepe paper and glue the candy.
You got 3 layers of different sizes. Wrap each beautiful ribbons and tie a bow.
Decorate the lower “cake” of the cake with candles, and the top one with any colors. Glue to the base of the candle half a toothpick on a double-sided tape.
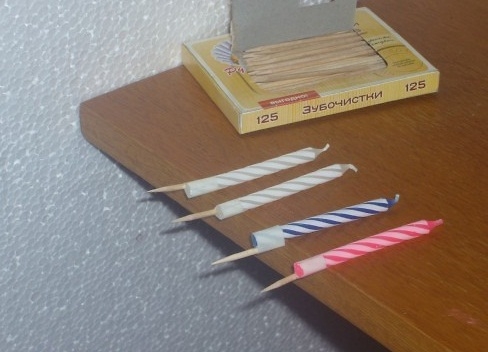
Cut out flower petals from foil or shiny paper.
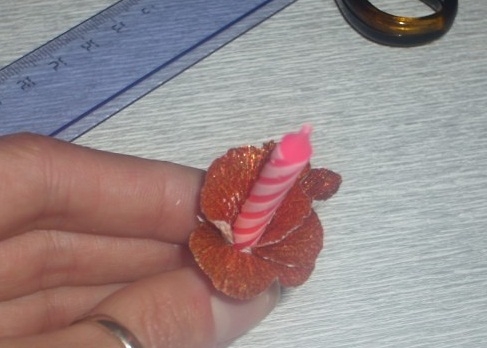
Glue the leaves to the tape, forming a flower. The tips of the petals stretch a little and with a pencil bend each one to the bottom.
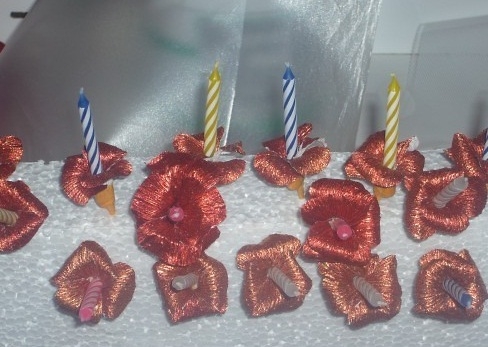
Attach the finished candles to the bottom layer of the cake.

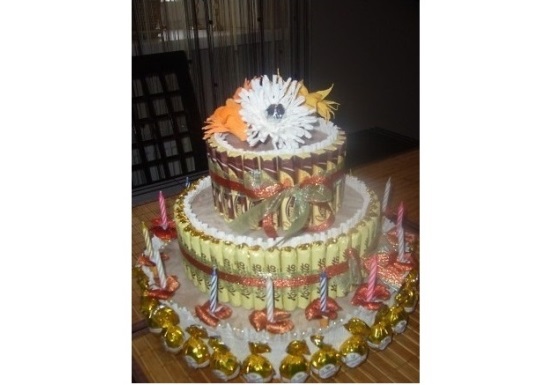
You will need:
- Candy of several kinds;
- Double-sided and regular scotch;
- Scissors;
- Gift ribbon;
- Whatman;
- Glue;
- Gift paper;
- Toothpicks.
Instructions for implementation:
Using cardboard or colored paper, make as many “cakes” as you need for your cake. If you do not want to cook the product levels yourself, you can buy round boxes of chocolates of different sizes in the store.
Now, glue the candy to each level with double-sided scotch. To make the cake brighter, attach different sweets to each layer. It is recommended to start with the top "cake".
Each row after this, tie with colorful ribbon. You can fill in the empty spaces with flowers.
Using gift paper, cut the squares of 10x10 cm. Take the candy, open it on one side and insert a toothpick. Wrap the end of the candy and secure it with scotch tape. Make these flowers about 20 pcs.
Instead of gift paper for making flowers, you can take corrugated. Cut out the petals from it and in a circle attach them with scotch tape to the candy with a toothpick. Now flowers can decorate the cake.
Candy Cake: Ideas

The art of combining various sweets can be mastered through simple workshops. But to really please a child or an adult is much more difficult.
Tip! Before you buy candy and plan decorations for the future of the cake, find out what the hero of the occasion likes. If you create a tasty work of art from the most favorite delicacies, the birthday boy will certainly notice and appreciate it!
In addition to candy, it will consist of decorations, which can be used as soft toys, notebook and pen, artificial flowers, ribbons, etc.
Some types of candy cakes can be made with a hollow inside, perfect for hiding a small gift.
Stages of creating a custom dessert
In order for the product to turn out great, you must carefully prepare and purchase the following components:
- styrofoam;
- candies;
- scissors;
- corrugated paper of different colors;
- double-sided tape;
- pVA glue.
Council It is more convenient for beginners not to start from the foam base, but from any finished box. You can use a round, high box of candy. Or build something similar from cardboard, fastening it with a stapler.
Stages of action:
1. Candy must be absolutely the same size. For this it is necessary to twist their tips firmly on both sides, and bend them down.
2. Mark the foam, and cut a circle out of it. This will be the basis of our cake.
3. Select the corrugated paper that matches the shade of the candy labels. Gently paste over the entire foam circle with paper. It is necessary to close the top, bottom and sides.
4. Wait until the base is dry.
5. Apply double-sided tape to the side surface along the entire perimeter. Do not peel the top tape completely.
6. Gradually, like beads on a string, attach each candy to the top of the scotch. All sweets should be evenly fixed. Put the candy on the base so that they cover absolutely the entire side surface.
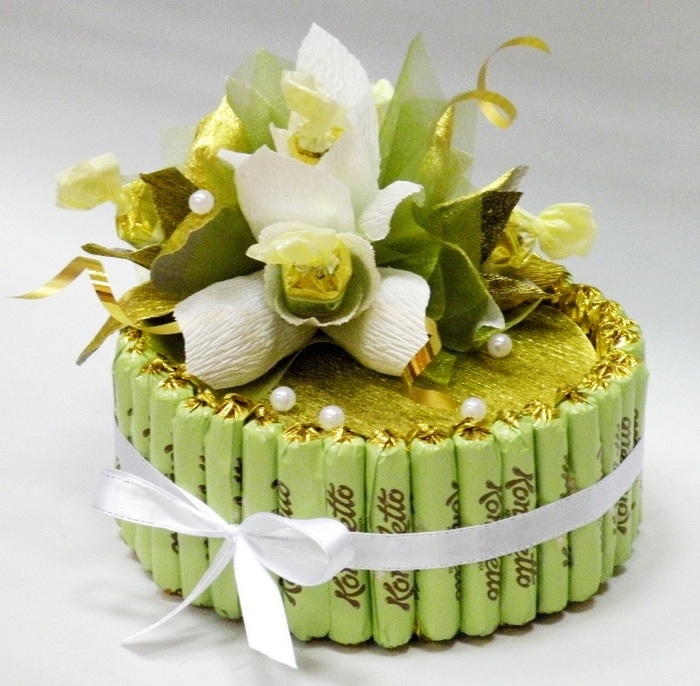
7. Fasten the dessert with any rubber band suitable for the base circumference. In order to mask the gum, tie a ribbon on top. If you have a thin ribbon, and a beautiful bow does not work out of it, then you can attach a special purchased bow with a stapler.
8. It remains to decorate the cake on top. For this fit any items you have.
Cake is ready! It will be an unexpected gift for any celebration and will cause sincere delight of the birthday man.
Varieties of Candy Desserts
If you have already mastered the first steps in making delicious and cute candy sweets, then you can train further. Candy can be made:
- multi-tiered cakes, consisting of several floors;
- candy stand;
- cakes on the specified principle, but with a hollow base in which a small surprise will fit.
The children will appreciate if you add not only sweets to the unusual structure, but also chupa chups. And on top - sprinkle with small marmalades or nuts. With these crafts you can dream and embody any ideas. And thankful friends and relatives will appreciate your efforts!
Cake from sweets - video master class
A beautiful cake made of sweets, especially not purchased, and made with your own hands will win the hearts of not only children, lovers of sweets, but also conquer any adult person.
After all, there are plenty of sweets on store shelves, and it is rather difficult to surprise your loved ones and relatives. But with a cake of candy with your own hands - everything is possible!
Nuances of making a cake of candy with their own hands, step by step
Moreover, such a product can be eaten for quite a long time and not be afraid of the fact that the culinary product is spoiled, for storage it does not even need a refrigerator.
A variety of recipes for such a masterpiece, a lot. The features of this cake are the shape of the product, the type of candy used to make it, their location and the functions that they will perform as the main ingredient of this product.
Important! Do not use for the manufacture of this type of cake sweets without wrappers. Since this is not hygienic, and simply ugly.
In addition, picking up candy to create such a masterpiece, you must take into account the preferences of those who will eat this delicacy. If a person is allergic, sweets with nuts or some kind of filling may not be suitable for him.
To complete the look of a sweet product, it must be decorated with various decorations in the form of - fabric, foil, ribbons, beads, glitter and artificial flowers.
How to make a delicacy cake made of sweets with your own hands, step by step
Would need:
Candy (chocolate).
Styrofoam.
Box with cookies round shape.
. "Raffaello" - a box of chocolates produced by an Italian manufacturer.
Corrugated paper.
Scissors, beads and glue.
Foil sheet.
Sticks and candles.
Colorful fabric.
Instruction
Step 1. The bottom layer for the future cake must be cut out of foam. It should be larger than the next layers of the culinary product. The edges of the foam must be treated with emery paper, for the smoothness of the bottom layer of cake and paste it with a bright cloth.
Step 2. The next layer will be a box with cookies, which must be glued with bright fabric using double-sided tape. Next, you need to cut a strip of corrugated paper with a width of about 5 cm and stick it on the middle layer in the form of a frill. And then from the sides using tape to secure chocolate sweets.
Step 3. For the lower tier of the cake, a strip of corrugated paper should be cut just above the base, gluing it to the foam with an adhesive tape. And the upper edges of the paper must be stretched to get some shuttlecock. The joint between the base and the flounce is recommended to glue with beautiful beads with glue. Boca same decorate sweets.

Step 4. The top layer of the newly-minted cake in the form of a box “Raffaello” needs to be pasted over with a cloth, fastened on the corrugation paper and pasted on the candies. The resulting three layers need to be individually wrapped with bright ribbons and tied in the form of bows.
Step 6. From paper, such as foil, you need to cut the petals for flowers. From the petals glued to the tape it is necessary to form a flower. The edges of each petal with a pencil recommended bend downwards. And after prepared in this way, the candles must be fixed on the lower tier of the cake.
"Basket" - a cake of sweets with their own hands, step by step
For making baskets of a simple version of a cake made of sweets with your own hands, you need:
Cardboard and double-sided tape.
Corrugated paper.
Chocolates (long) going to the base.
Candy for filling baskets.
Instruction
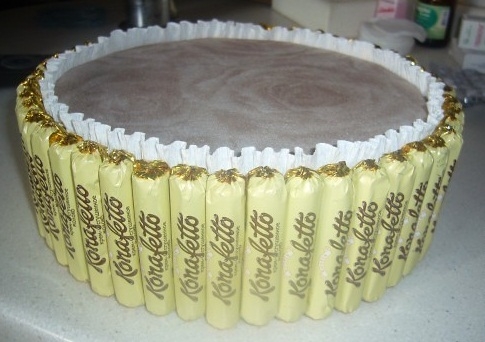
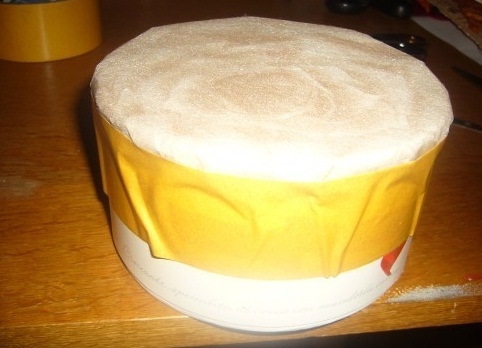
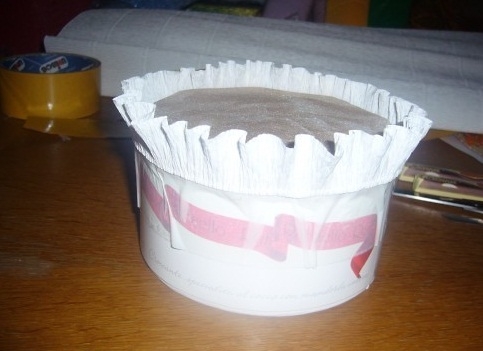
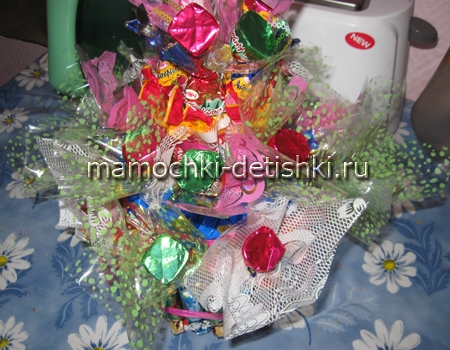
Step 1. Along the length of the chocolates chosen for the basis of the future cake, cut a rectangle out of cardboard, which should be turned into a cylinder when using glue. On one side of the cylinder, it is necessary to attach the bottom of a circular form made of cardboard, the base should be glued with corrugated paper. The tails of candy wrappers are recommended to be glued, directing them in one direction.
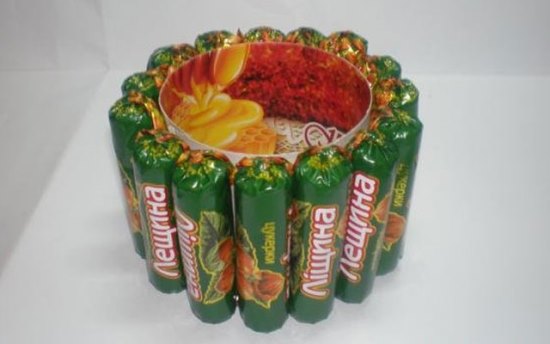
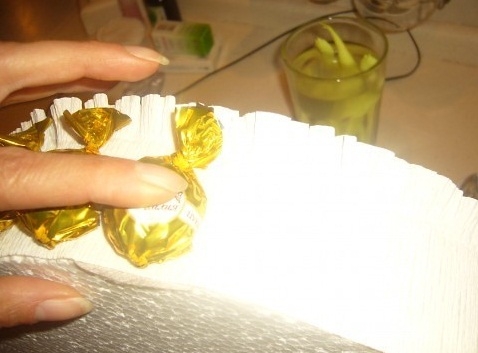
Step 2. On a cylindrical base need to stick two strips of tape, on top and bottom of the future baskets. On them, fix the candy tails inside and preferably closer to each other. Satin ribbon of the desired tone, tied in a bow, will give the finish to the image.
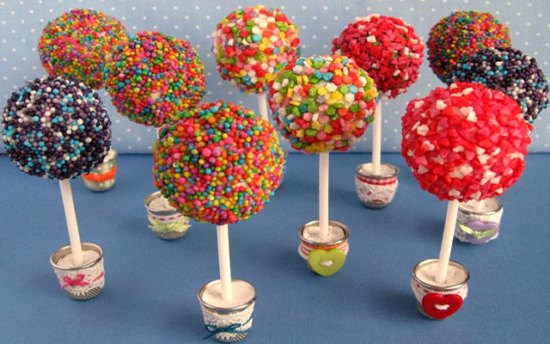
"Original tree" - a cake made of sweets with your own hands, step by step
Such a tree can be created using chupa-chups candy for handicrafts or using other sweets on sticks.
It will take:
Candy on sticks.
Plasticine (edible).
Varied topping.
Thimbles.
Decorations for pots.
Gypsum and some water.
Instruction
Step 1. It is necessary to stick the candy in a thimble and strengthen it with plaster, clay or dough. Next, it is necessary to give time to the material to harden.
Step 2. Then it is necessary to remove the wrapper from the candy, and from the edible plasticine form a kind of round ball.
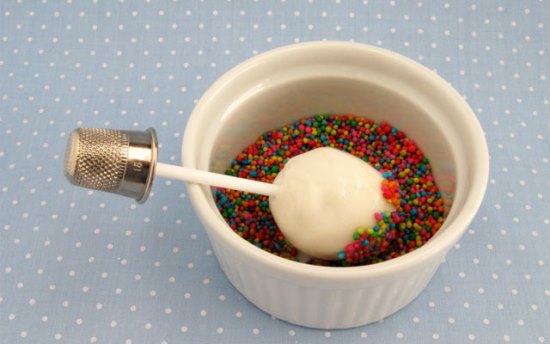
Step 3. After wetting the candy with some water, you need to dip it in the dressing in such a way that all small details stick to it.
Step 4. And finally, it is necessary to decorate the thimble with foil, ribbons and other tinsel.
It is not very difficult to make a chocolate cake with your own hands. To do this, you should show imagination and use suitable products.
There are many ways to design such a delicacy. In this article we will present the most popular and simple recipes, for the implementation of which you do not need a lot of time and effort.
Cake made of chocolate with their own hands. Master Class
If you do not want to bake biscuits or cakes, then we suggest making only chocolate bars and a set of stationery for cooking.
So how to make a cake of chocolate with your own hands? For this you need to prepare:
- wrapped chocolate bars (like Mars, Snickers, Milkway, Twix, etc.) - at your discretion;
- cardboard (not very thick);
- wrapping paper;
- scissors, glue, tape unilateral, double-sided tape;
- confetti or crepe paper.
Making a frame
Before you make a chocolate cake with your own hands, you need to make a frame. For this we decided to use plain cardboard. It is cut into two strips 10 cm wide. In this case, one stripe must be longer than the other.
Gluing the ends of the cardboard, you should get two through cylinders, the diameter of which is equal to 25 and 15 cm, respectively. After that, proceed to create the cover. For this purpose, circles are cut out of cardboard, the diameter of which also corresponds to 25 and 15 cm. They are glued to the cylinders with scotch tape and beautifully wrapped with multi-colored gift paper. If you have not found one, then you can use the usual candy wrappers from under the candy. 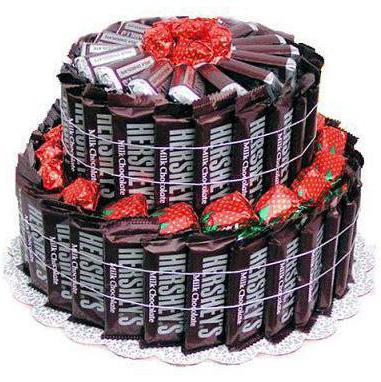
As soon as the cylinders are ready, they are placed on top of each other (small on large) and carefully fastened with adhesive tape.
As a result of these actions, you should get a beautiful frame of the future two-story cake.
Decorating process
Do-it-yourself chocolate cake is made much faster than the classic biscuit dessert. Moreover, this delicacy is very original. Preparing him for your child, you give him a huge amount of positive emotions.
So how should you make a chocolate cake with your own hands? To do this, we need the usual double-sided It is attached to the back side of the bars in the wrapper, and then carefully remove the protective layer and glued to the lower tier of the frame.
Putting chocolates in this way should be very tight. If at the very end you have too little space left for a standard bar, then you can buy a narrower candy in a wrapper.
In the same way decorate the second tier of the frame.
After the sides of the cake are covered with chocolate, its loose tops are sprinkled with confetti or shredded crepe paper.
How to serve?
As you can see, making a chocolate cake with your own hands (the photo of the dessert is presented in this article) is not so difficult. After it is formed, it must be placed on a beautiful flat dish and served to the table. 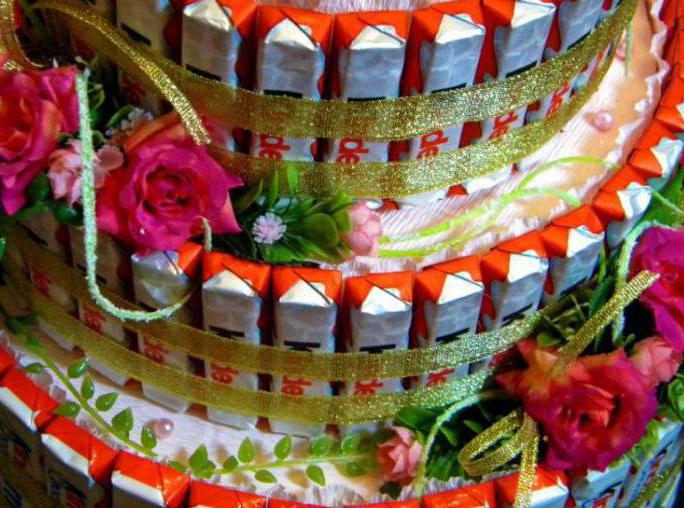
The great advantage of such a delicacy is not only the speed of its preparation and the absence of heat treatment, but also the ability to store it not in the refrigeration chamber, but at room temperature (just not in the sun).
Making candy
A cake made of chocolates and sweets, created with your own hands, will surely delight your children. You can decorate this delicacy in different ways. If you want to get a high dessert consisting of several tiers, then we suggest using this recipe. To implement it, we will need:
- circles of dense foam of arbitrary height (it is necessary to focus on the height of the candy), the diameter of which is 25, 20, 15, 10 and 7 cm, respectively;
- any large candy;
- any wrapping paper;
- mistletoe leaves, artificial needles, bow for decoration;
- glue gun.
Step by Step Preparation Process
How to make a cake of chocolates and sweets with your own hands? First you need to process the main ingredient. Small chocolates or large sweets are required to be wrapped in gift paper to make them look like appearance. If you purchased a treat in the same wrapper, then this procedure can be omitted.
Also separately should be processed and the circles of foam. To do this, they are wrapped in gift paper, which is fixed by means of Then all the circles fold on top of each other, starting from the largest to the smallest. At the same time they are well connected with each other.
After preparing the frame and chocolates proceed to the formation of the cake. It is done exactly as described above. A small amount of glue is applied to the back of the candy, and then it is strongly pressed against the side surfaces of the frame. 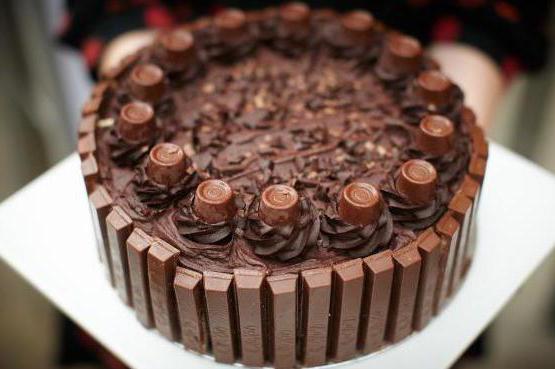
Final stage
After all the candies are glued to the circles of foam, proceed to decorate the cake. For this purpose, artificial needles, bows and mistletoe leaves are used.
Strictly performing all the steps described, you should get a very tall and beautiful dessert. Serve it to the table should be on a large cake table with a cup of tea.
DIY chocolate cakes: step by step photos, cooking
Above, we presented to your attention two ways of how to make a dessert from chocolates and sweets at home. Such recipes are especially popular among those who do not know how to make pastries.
If you like messing with dough, then you can make a festive cake with chocolates with the help of a self-made sponge cake. How exactly to implement this recipe, we will tell right now. For this we need:
Cooking sponge cake
Before you create a cake with chocolate "Kinder" with your own hands, you should prepare a sponge cake. To do this, add sugar to the egg yolks and pound hard with a spoon. Next, beat the proteins to persistent peaks and spread them to the yolks.
Mix the ingredients thoroughly, add cocoa (four large spoons) and light sifted flour to them. At the exit receive magnificent and uniform dough of a viscous consistence. It is laid out in a mold, oiled, and sent to the oven.
Chocolate sponge cake is baked for about an hour at a temperature of 200 degrees. After a specified time, it is removed, spread on a cake plate and cooled. After that, the sponge cake is cut into two identical cakes.
Cream making process
Cream for this cake is better to use oil. It will allow to fasten chocolates well and get a very beautiful and original dessert.
To prepare the cream, butter is whipped strongly with a mixer, and then gradually add to it the residual cocoa and condensed milk. Mix the ingredients well, get a very lush and fragrant chocolate mass.
Cake forming
Such a dessert is formed easily and simply. First, the surface of one of the cakes is carefully smeared with butter cream and sprinkled with a small amount of M & M's candy. 
If it seems to you that the dessert will turn out too dry, the cake should be pre-soaked with some syrup.
After the described actions get a classic Of course, it can be used in this form. However, it will be better if the delicacy is decorated with chocolates.
Decorating process
Do-it-yourself decorating chocolate cake “Kit-kat” follows the same principle as in the two previous recipes. To this end, a waffle treat is alternately attached to the side surface of the dessert. If you have used a sufficient amount of butter cream, then the chocolates should hold fairly tightly. By the way, instead of "Kit-kata" you can use similar products like "Kinder". If desired, these chocolates can be combined, alternately sticking them to the side surface of the cake.
If it seems to you that the items are holding up badly, then they must additionally be fixed by means of a beautiful satin ribbon. So your cake just does not fall apart, but it will turn out even more original.
After the side portions of the dessert are covered with columns of chocolate, proceed to decorate the surface of a homemade treat. For this we decided to use M & M "s. It is simply spread on the surface of the cake, and then sprinkled with confectionery chips of a contrasting color.
How to serve for the festive table?
Unlike those cakes that were presented above, a chocolate biscuit-based dessert should be kept in the refrigerator for several hours. This is necessary so that the cakes are well soaked with cream and syrup. 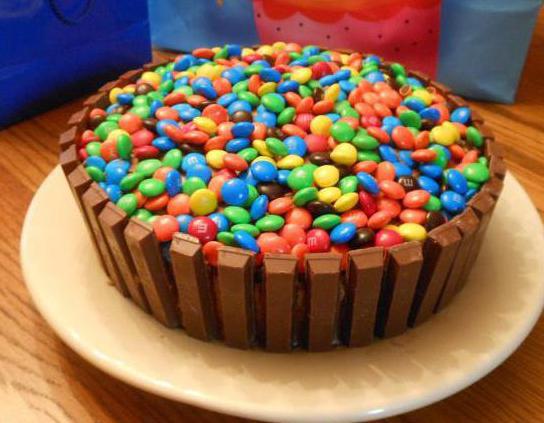
Then the cake with chocolates is served at the table. It is neatly cut into pieces (for example, three chocolates on the side surface) and served to guests along with a glass of tea.
Let's sum up
Now you know the simplest and most popular recipes for chocolate and chocolate cakes. By implementing these methods in practice, you will definitely get incredibly beautiful and tasty desserts that are ideal for any holiday table.
Showing imagination, you can independently invent your own methods. Successes in creativity!
